Kids

Corn Maze at the Farm


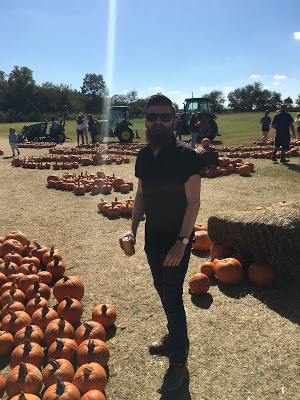
Welcome to Barton Hill Farms near Austin, Texas!  They have an amazing corn maze that goes through a layout change every year.  

This year the design was the Lonesome Dove.  

The crew puts a ton of hard work into the annual event and are quite ingenious with year to year changes.  Check them out! 

http://bartonhillfarms.com/

download.jpg
download (1).jpg
download (2).jpg
download (3).jpg

Midwesteners will notice that the corn is missing as the farm chose to use a product with a stronger stalk! Sorghum! Texas has wild hogs that will plow right through the field!

download (5).jpg
download (6).jpg
download (7).jpg
download (8).jpg
download (9).jpg
download (10).jpg
download (11).jpg
download (12).jpg
download (13).jpg
download (14).jpg
download (15).jpg
download (16).jpg

withangelao'

Travel Tic Tac Toe

Original DIY Tic Tac Toe travel game board from the 1990's

download (16).jpg

I loved this DIY Tic Tac Toe traveling game so much as a child that I still have the original game that I made.  It's super easy to make for your child and even with your child that you may feel brave enough to have a large group of kiddos over to instruct.  Adult Child Group Fun!  a.k.a. birthday parties, project parties, rainy days, etc.  The best part... The game board and playing pieces are made out of felt so that when playing in the car, the pieces are not lost. So clever.

I think I was about 6 to 8 years old, so I believe it was my awesome Sunday School teacher Denise Kistner who instructed our class to make this project.  I don't want to leave out Connie Hester either...just in case it may have been her as she was another one of my awesome Sunday School teachers.  Kudos!

Make it yourself using the instructions below.

download (17).jpg

The felt pieces don't fall off when tipped over

download (18).jpg

Write the kid's name and a message of your choice

Materials Needed:

  • Felt, 4 different colors
  • Pinking Shears
  • Foam Core Board
  • Glue
  • A Permanent Marker
  • Gallon Size Zipper Bag

Instructions:

  • Measure the foam core board to 8 inches by 8 inches and cut.
  • Write a message on the back on the side you have determined to be the back of the board.
  • Measure felt color #1 and cut with the pinking shears. Approximately 8 inches by 8 inches (make sure it's large enough to cover the board!).  Once cut, glue this to the foam board.  Gluing it now will allow it to have some time to set prior to adding the next layer.
  • Measure strips from felt color #2 and cut using the pinking shears. Approximately 1/2 inch by 8 inches.  Not too thick, not too thin.  If the fabric is cut with the pinking shear points lined up then the width may go a little over a half inch, that is okay.  Make 4 of these.
  • Measure rectangles from felt color #3 and cut using the pinking shears.  Aproximately 1 inch by 1 3/4 inch.  Again this is approximate, the main point to remember is to make sure the pieces are large enough for hands to pick up easily but small enough for them to fit inside the tic tac toe boxes. Make 5 of these and perhaps one back up if you'd like.
  • Measure circles from felt color #4 and cut using the pinking shears. Approximately 1 1/2 inch by 1 1/2 inch.  Again this is approximate, the main point to remember is to make sure the pieces are large enough for hands to pick up easily but small enough for them to fit inside the tic tac toe boxes.  Make 5 of these and perhaps one back up if you'd like.
  • Glue the measured strips that you cut from felt color #2 to the felt covered foam board, using the lattice style method.
  • Do NOT put your foam rectangles/circles on the foam board until you know the board has completely dried.  You wouldn't want to accidentally glue pieces to the board making them permanently unplayable, would you?
  • When complete, store in a zipper bag and keep it in the family car.

With Angela O'

download (19).jpg
download (20).jpg

Make at least 5 pieces each shape

download (21).jpg

BAG IT AND STICK IT! in the car

Pressed Pennies Tastefully Secured


Do you know all those pressed penny machines that people get suckered in to using while they are visiting a tourist attraction?  They are everywhere...Disney, Universal, zoos, aquariums, skyscrapers, some gas stations.  You know?  The ones that you had so much fun as a kid making and your parent couldn't say no because it was the one souvenir that was actually affordable. Fifty-one cents. Two quarters and a penny.  Hopefully you had a shiny penny.

Well, I have a lot of pennies from when I was younger and I really enjoy the memories for each one.  During the first few years of my marriage we were on an extremely tight budget.  If we ever visited a tourist location the trinket that we knew we could afford (and too avoid bringing home excessive junk) were the pressed pennies.  As silly as they were we are delighted to look back at them.  

At home and in the workplace I love having everything exactly in its place.  I do not like junk everywhere but junk itself can be okay if setup tastefully.  I have never had a nice way to store the pressed pennies and I never liked anyone's suggestions.  Even the little penny books sold in the tourist retail stores were out of the question for me.  So for a long time they sat in a photo box on our bookshelf.  Well, eureka!  I happened to come across some heavyweight page protectors that were made for slides and they measured at 2"x2" and were three-hole-punched.  The accessibility to use binders for keepsakes are very important for me. All of my albums have been transferred to cloth D-ring binders by American Crafts.

Materials:
  • Scrapbook Paper
  • Small Labels
  • Acid-Free Marker or Pen
  • Glue Dots, the larger size
  • 2"x 2" Slide-style Sheet Protectors, sized for 3-ring binders
  • Scissors or Fiskers Photo Cutter
  • 3-Ring Photo Album or Binder

Instructions:
Measure the paper down to the size of the protected pocket and cut into the 2"x 2" squares.  Write a description on the label and attach it to the cut paper.  Then secure the penny to the cut paper by using a glue dot.  Super easy and very quick.


This is also a great craft project for kids who collect their pennies!

Angela O'

Girlie Girls & Hair Bows

Hair Bows that are super easy to make!  Most of the materials you probably already in your home.  My now Arizona-based friend Michelle Pettit and I got together one night to make these for a private elementary school's fundraiser.  It was so much fun!  

A sampling of the creations are below.  We did this last October so you will notice that the holidays are making an appearance in a couple of the designs.

Materials Needed: Ribbon, Hot Glue & Hot Glue Gun, Barrettes, and Embellishments


Created by Michelle Pettit

Created by Angela O'


Created by Angela O'

Created by Angela O'

Created by Michelle Pettit

Created by Angela O'

Created by Michelle Pettit

Created by Michelle Pettit