Creative

Travel Tic Tac Toe

Original DIY Tic Tac Toe travel game board from the 1990's

download (16).jpg

I loved this DIY Tic Tac Toe traveling game so much as a child that I still have the original game that I made.  It's super easy to make for your child and even with your child that you may feel brave enough to have a large group of kiddos over to instruct.  Adult Child Group Fun!  a.k.a. birthday parties, project parties, rainy days, etc.  The best part... The game board and playing pieces are made out of felt so that when playing in the car, the pieces are not lost. So clever.

I think I was about 6 to 8 years old, so I believe it was my awesome Sunday School teacher Denise Kistner who instructed our class to make this project.  I don't want to leave out Connie Hester either...just in case it may have been her as she was another one of my awesome Sunday School teachers.  Kudos!

Make it yourself using the instructions below.

download (17).jpg

The felt pieces don't fall off when tipped over

download (18).jpg

Write the kid's name and a message of your choice

Materials Needed:

  • Felt, 4 different colors
  • Pinking Shears
  • Foam Core Board
  • Glue
  • A Permanent Marker
  • Gallon Size Zipper Bag

Instructions:

  • Measure the foam core board to 8 inches by 8 inches and cut.
  • Write a message on the back on the side you have determined to be the back of the board.
  • Measure felt color #1 and cut with the pinking shears. Approximately 8 inches by 8 inches (make sure it's large enough to cover the board!).  Once cut, glue this to the foam board.  Gluing it now will allow it to have some time to set prior to adding the next layer.
  • Measure strips from felt color #2 and cut using the pinking shears. Approximately 1/2 inch by 8 inches.  Not too thick, not too thin.  If the fabric is cut with the pinking shear points lined up then the width may go a little over a half inch, that is okay.  Make 4 of these.
  • Measure rectangles from felt color #3 and cut using the pinking shears.  Aproximately 1 inch by 1 3/4 inch.  Again this is approximate, the main point to remember is to make sure the pieces are large enough for hands to pick up easily but small enough for them to fit inside the tic tac toe boxes. Make 5 of these and perhaps one back up if you'd like.
  • Measure circles from felt color #4 and cut using the pinking shears. Approximately 1 1/2 inch by 1 1/2 inch.  Again this is approximate, the main point to remember is to make sure the pieces are large enough for hands to pick up easily but small enough for them to fit inside the tic tac toe boxes.  Make 5 of these and perhaps one back up if you'd like.
  • Glue the measured strips that you cut from felt color #2 to the felt covered foam board, using the lattice style method.
  • Do NOT put your foam rectangles/circles on the foam board until you know the board has completely dried.  You wouldn't want to accidentally glue pieces to the board making them permanently unplayable, would you?
  • When complete, store in a zipper bag and keep it in the family car.

With Angela O'

download (19).jpg
download (20).jpg

Make at least 5 pieces each shape

download (21).jpg

BAG IT AND STICK IT! in the car

Snails for You

blogger-image-212315230.jpg

One of my favorite things to do is to send letters to all my friends and family that have local stickers plastered all over them.  Any time I visit one of my favorite places I grab some of their free stickers.  I usually tell the company what I'm up to and they have always been happy to hand them right over.  It's so much fun to share my favorite spots!!!  I have so many.

With Angela O'

blogger-image--999304608.jpg

Girlie Girls & Hair Bows

Hair Bows that are super easy to make!  Most of the materials you probably already in your home.  My now Arizona-based friend Michelle Pettit and I got together one night to make these for a private elementary school's fundraiser.  It was so much fun!  

A sampling of the creations are below.  We did this last October so you will notice that the holidays are making an appearance in a couple of the designs.

Materials Needed: Ribbon, Hot Glue & Hot Glue Gun, Barrettes, and Embellishments


Created by Michelle Pettit

Created by Angela O'


Created by Angela O'

Created by Angela O'

Created by Michelle Pettit

Created by Angela O'

Created by Michelle Pettit

Created by Michelle Pettit


Kick the Bore out of Fundraising

Try adding some creative flair to boring old fundraising.  Here are a few loose change buckets that I created for Coin Campaigns.  The painter style bucket with the bright ribbons and flowers was created Spring of 2013 and the jars with rhinestones were created Spring 2012 using empty OJ bottles, sequins and rhinestones.  Now we have a reason to keep the awesome looking Simply Orange bottles when they are empty without earning the title of hoarder.  Problem Solved.  Since I introduced these awesome jars into our community some of the local fundraising groups have now picked up their gamem I never see boring coffee cans at the cashier's counter anymore.

The group that is fundraising in these photos is Team MorGame for JDRF.  JDRF is a national organization that seeks the cure for Type 1 diabetes.  


A Beatrix Potter Baby Shower


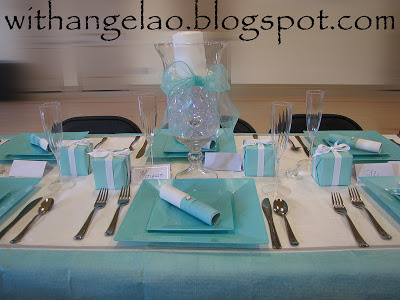
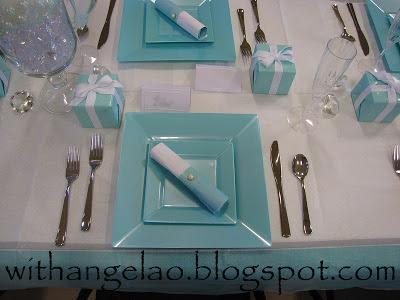
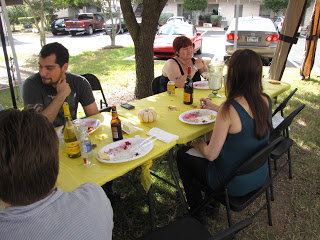
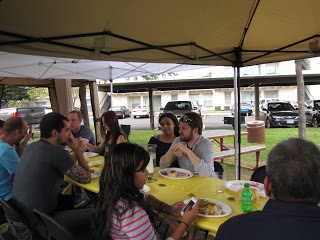
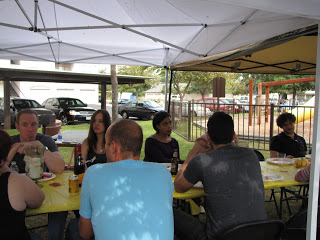
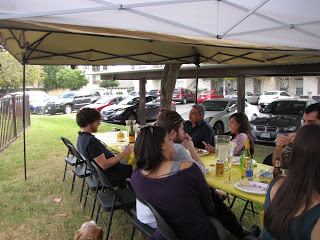
One of my best friends recently gave birth to her first child, a son.  She introduced the first year of his life to many classic nursery rhymes incorporating them in the baby shower, baby nursery, and soon-to-be first birthday celebration.  A connection that she and her twin sister once shared from their childhood nursery.  Unfortunately I could not travel to the baby shower, as it was to be in St. Louis and I had just gotten settled in at Austin.  Her sister was the hostess and I co-hosted games from afar.  I handmade all of the games to be a custom fit for her Beatrix Potter theme.  In addition, I presented them in a way that she could keep them nicely tucked in a box so that when the baby was old enough Mommy and Daddy could play the games with him.  A neat and interactive way to learn the very interesting history of Beatrix Potter.  

Today I would love to provide inspiration to anyone who is tired of the stale games offered in books, online, and at party stores.

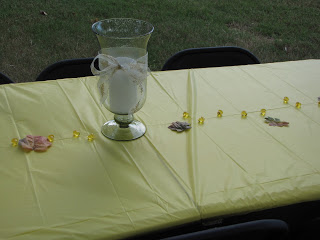
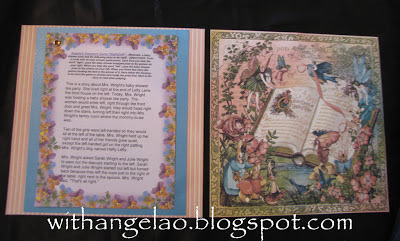
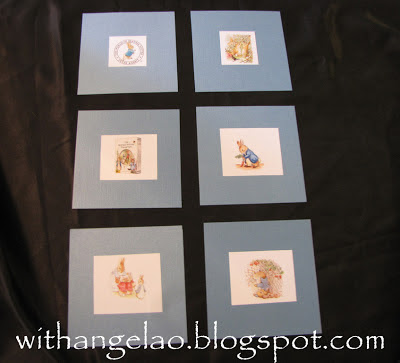
Supplies Needed: color printer (or office printing store), scissors, nice scrapbook paper,  8.5x11" sheets of blank & printed paper, glue, metallic marker, organza ribbon, saftey pins, and a scrapbook brad to connect multiple pages (used on the Left/Right game hostess sheet).  Both the Bazill brand Prince Charming blue and the Beatrix Potter print paper were from Archiver's which I purchased in Winter 2011.  They are in 12x12" sheets that I cut down to size.  These papers were used to make the hostess sheets and game cards so that the back was a pretty sight for the guests and guest-of-honor.

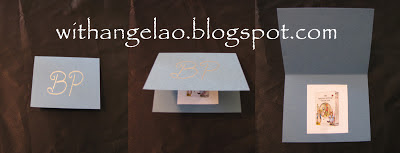
I also made hostess instruction cards that were approximately 6x6 inches (12x12 sheet, quartered) so that when the day came each game would run smoothly.  The colors were coordinated to be tied in to the look of the shower but small enough to hold and be discrete.  All you do is print the instructions on computer paper and then past the instructions onto the cut down scrapbook paper for a matted look.


PASSIVE GAME:  Under the Chair 


Before any of the guests arrive place a symbol under one of the chairs so that the guest who will be seated there will later be announced as the winner of a door prize.  I used a printed nursery rhyme picture adhered to textured scrapbook paper, monogrammed with a silver BP to make a small note card that would fit securely under the chair with tape.   


PASSIVE GAME:   "Don't Say Baby"


As everyone arrives be sure to give them a ribbon with safety pins.  Each ribbon has 4 playing pins plus one attachment pin for the guests blouse.  Instruct all guests to not say the word “baby”.  If they are caught saying "baby" they have to give one of their safety pins to the person they said it to.  At the end of the shower, ask the guests to tally up their pins.  Whoever has the most pins wins a prize.  This would be a great game to designate to a co-host to stand at the door to pass out and quickly explain the rule.


ACTIVE GAME:  "Angela's Signature" Left Right Game

Left/Right Game Hostess Sheet - Front & Back

Left/Right Game Hostess Sheet - Front

The hostess will need to use an object to pass around the table, like a flower or stuffed animal. Only one item can be used.  If there are multiple tables then designate one corner of each as the bridge so that the item moves on to the next table smoothly.  The hostess will read the story out loud to the guests.  Each time the guests hear the word “right” or “left” (spelled in many different ways) the guest holding the object will pass the item in the designated direction.  The last person holding the item wins a prize.  Do this game first as it is very active and will get the ladies excited.  Do this while the guests are sitting but before they eat because it is a bit of a riot.

*The Left/Right story is at the bottom of the blog


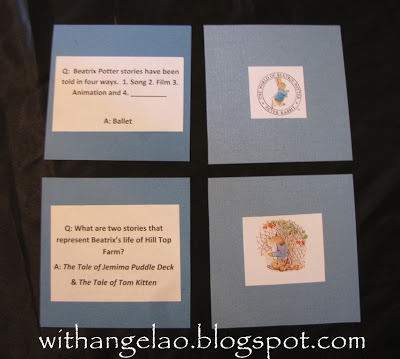
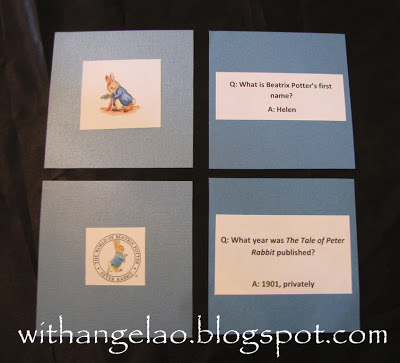
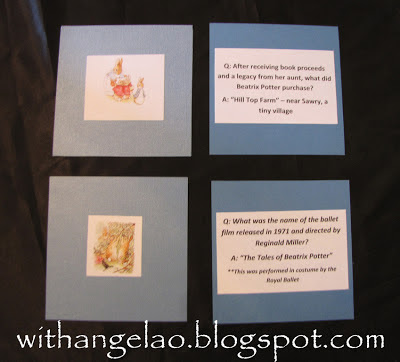
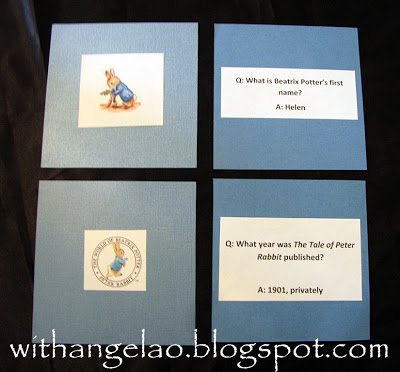
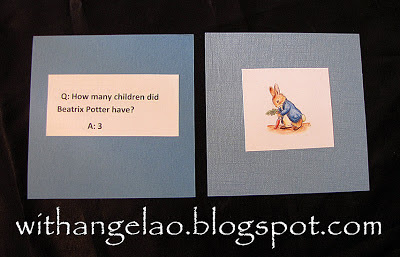
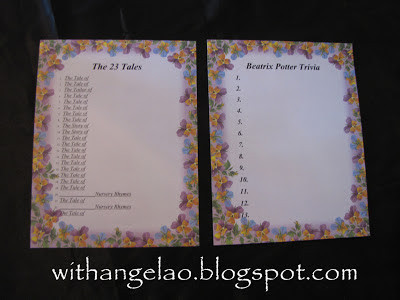
ACTIVE GAME: Beatrix Potter Trivia 

The Beatrix Potter Trivia Hostess Cards


Beatrix Potter trivia cards.  Use these hostess cards to announce the question.  They are made to look like game show cards.  Give the guests approximately 10 seconds or so to hand write their answer on their own answer sheet.  There are 13 questions, at the end of all the questions the hostess will then announce the answers.  Making sure to  re-read them in the same order.   The person with the most correct wins a prize. 

**Save time by placing the guest blank sheets at the guest seats before they arrive.  Include pens.  This game should be done during eating or after, while at the table.

*The Beatrix potter trivia is at the bottom of the blog


ACTIVE GAME: The 23 Tales

The 23 Tales Hostess Sheet

The guest answer sheet for 23 Tales & BP Trivia

The 23 tales of Beatrix Potter. The hostess will announce to the guests that they will get 4 minutes to jot down as many Beatrix Potter tales that they know on their game sheet once you say “GO”. Once the four minutes are up the hostess will read off the answers from the hostess sheet.  Ask the guests how many they got right.  The person with the most wins a prize.

**Save time by placing the guest blank sheets at the guest seats before they arrive.  Include pens. This game should be done after eating or during dessert, while at the table.


*The 23 Tales List is at the bottom of the blog


PRESENTATION:

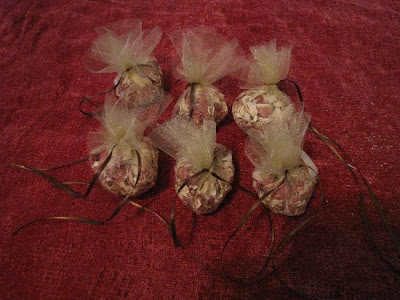
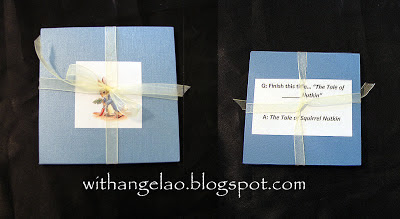
An easy way to transport to the shower and to present is to tie organza ribbon on the game cards.  


BP TRIVIA:  All based on my own research of Beatrix Potter

Q: What is Beatrix Potter’s first name? 
A: Helen 

Q: What year was Beatrix Potter born? 
A: 1866 

Q: What was Beatrix Potter’s brother’s name? 
A: Bertram (Walter Bertram) 

Q: What year was The Tale of Peter Rabbit published? 
A: 1901, privately 

Q: How many children did Beatrix Potter have? 
A: 3 

Q: After receiving book proceeds and a legacy from her aunt, what did Beatrix Potter purchase? 
A: “Hill Top Farm” – near Sawry, a tiny village 

Q: How many books did Beatrix Potter publish? 
A: 23 

Q: Beatrix Potter stories have been told in four ways. 1. Song 2. Film 3. Animation and 4. _________ 
A: Ballet 

Q: To earn money in the 1890’s what did Beatrix and Bertram do? 
A: Designed and printed their own Christmas and Special Occasion cards 

Q: What were Beatrix Potter’s “Four Little Rabbits” names? 
A: Flopsy, Mopsy, Cottontail, and Peter 

Q: Finish this title… “The Tale of ______Nutkin” 
A: The Tale of Squirrel Nutkin 

Q: What are two stories that represent Beatrix’s life of Hill Top Farm? 
A: The Tale of Jemima Puddle Deck & The Tale of Tom Kitten 

Q: What was the name of the ballet film released in 1971 and directed by Reginald Miller? 
A: “The Tales of Beatrix Potter”   **This was performed in costume by the Royal Ballet


The 23 Tales

The Tale of Peter Rabbit (1902)
The Tale of Squirrel Nutkin (1903)
The Tailor of Gloucester (1903)
The Tale of Benjamin Bunny (1904)
The Tale of Two Bad Mice (1904)
The Tale of Mrs. Tiggy-Winkle (1905)
The Tale of the Pie and the Patty-Pan (1905)
The Tale of Mr. Jeremy Fisher (1906)
The Story of A Fierce Bad Rabbit (1906)
The Story of Miss Moppet (1906)
The Tale of Tom Kitten (1907)
The Tale of Jemima Puddle-Duck (1908)
The Tale of Samuel Whiskers or, The Roly-Poly Pudding (1908)
The Tale of the Flopsy Bunnies (1909)
The Tale of Ginger and Pickles (1909)
The Tale of Mrs. Tittlemouse (1910)
The Tale of Timmy Tiptoes (1911)
The Tale of Mr. Tod (1912)
The Tale of Pigling Bland (1913)
Appley Dapply's Nursery Rhymes (1917)
The Tale of Johnny Town-Mouse (1918)
Cecily Parsley's Nursery Rhymes (1922)
The Tale of Little Pig Robinson (1930)


Angela’s Signature Game “Right/Left” 
This is a story about Mrs. Wright's baby shower tea party. She lived right at the end of Lefty Lane, the third house on the left. Today, Mrs. Wright was hosting a baby shower tea party. The women would enter left, right through the front door and greet Mrs. Wright, they would head right down the stairs, turning left then right into Mrs. Wright's family room where the mommy-to-be was.


Two of the girls were left-handed so they would sit at the left of the table. Mrs. Wright held up her right hand and all of her friends grew quiet, except the left-handed girl on the right patting Mrs. Wright's dog named Hefty Lefty.


Mrs. Wright asked Sarah Wright and Julie Wright to pass out the teacups starting to the left. Sarah Wright and Julie Wright started out left but turned back because they left the cups just to the right of the table, right next to the spoons. Mrs. Wright said, "That's all right." 

Mrs. Wright began to serve her friends some pie when Grandma Wright smelled the delicious desserts and left her bedroom to join the Wright girls. She went down the stairs and turned left than right, right into Mrs. Wright's family room.

Grandma Wright knocked and entered left and sat in the rocking chair on the left. Sarah Wright and Julie Wright invited Grandma Wright to join them at the table.

Grandma Wright had been to many baby showers as a young girl and right before they realized it, Grandma Wright was telling them stories from when she was the mommy-to-be and went to the right cabinet and in the left drawer were pictures of her baby shower.

As the party ended right on time, they all put their dishes right in the left side of the sink and thanked Mrs. Wright and Grandma Wright for such a wonderful time. Soon, all of the women from the Wright baby shower tea party turned right than left, then left again to return to the front door and out to the right car that they arrived in. Down lefty lane they went. Now who ended up with the right gift?


 **This is considered Angela's signature baby shower game simply because it is always so popular and the guests have so much fun.  I did not create this game but it has been so long since I first used it I can't remember who was the original source.

Mastering a Tiffany Blue Brunch


Mastering a Tiffany Blue Brunch in 3 days was going to be a challenge.  But you know how I love to out-do my challenger.  So here is the scoop.

These tableware pieces are the unofficial, official Tiffany Blue color "Robin's Egg Blue" from the manufacturer Amscan.  Amscan is the parent company of Party City.  Exactly 2 Autumns ago this past September I had the pleasure of visiting the Amscan Corporate Showroom in the gorgeous Westchester County, NY.  There they unveiled their newest party color of Robin's Egg Blue the match to Tiffany & Co.  Of course this color is devoured by brides everywhere but why should brides be the only ladies to enjoy it.


Welcome to the Tiffany Blue Brunch where 17 young ladies celebrated a very special friend's birthday.


I sourced Annie's Cafe, a well-known French bistro in Austin, Texas as the caterer for this event.  Highlights of the brunch were the Ham & Gruyere Frittata and Quiche along with the fresh chocolate croissants.  Each girl enjoyed there juice-tail from stemware making this day a bit more special.


The napkin rings were made using the coordinating Tiffany Blue wrapping paper and pearl/gold scrapbook brads found in the bridal section.

The favor boxes were wrapped in the coordinating Tiffany Blue wrapping paper and hand-tied to present the exact Tiffany bow!  Inside the ladies found a costume pearl & rhinestone bracelet accompined by a bottle of China Glaze's For Audrey nail lacquer. 


The table was to speak solely of Tiffany's, the diamond and pearl decor, the glass "crystal" pitchers and the silver cake stand and platters.

The final touch was the elegant Tiffany box made of fondant cake from Coco Paloma Desserts.  Thank you dearest Paloma for assisting me on this event!  


~With Angela O'


Cedar Sachets to Protect Your Clothes


John and I have been purchasing cedar blocks and balls for our closets and dresser drawers for over a year now and none of them seem to actually keep out the moths.  We have been replacing them and sanding them to refresh the scent but it never lasts.  So this time we decided to make our own cedar sachets.  Yes it does save money because over time you won't have to continuously replace the supplies by purchasing all new products but we did not chosse this method to save money alone.  We were tired of the hassle and our clothes not being protected.  Try this and see how it works.  So far it has worked for us.

Supplies Needed:

*10 inch tulle circles
*1/8 inch Ribbon (Spool)
*Cedar


Just use one circle, put a small handful of cedar shavings in the center, and tie up with ribbon

Tips:

*Get 10 inch tulle circles from the craft store in a 25 pack for only $3.00.  Choose any color you wish.  I used the Gold Rush because I felt that it was the most versatile.  This method is a lot easier than purchasing tulle by the yard in the fabric department.  This way you do not have to worry about cutting the tulle down to the dimensions you need.

*The 1/8 inch ribbon brand Berwick Offray is great for this project and very inexpensive.  Again a wide array of colors to choose from to coordinate with the look you are trying to achieve.

*We ended up purchasing our cedar chips from Petsmart at $7.49.  25 sachets worth barely dented the bag.  You are better off getting with a few friends to split the bag so that you don't have so much left over.  Remember that although this a very cost effective way the primary reason to make your own cedar sachets is so that the cedar scent lasts longer and the repellent is most effective against moths and other insects.

* Tie up the sachets in your closet or tie the ribbon into a bow for those that will sit inside your dresser drawer. 
These are the pre-made blocks we have purchased in the store but after a few days to few weeks are useless

Hand-Dipped Pretzel Rods


Today I made hand-dipped pretzel rods for a cookie exchange.  The process was a lot of fun but did require a lot of patience and detail.  They were a hit tonight and someone even placed an order with me to make them as their gifts to give this week.  What a great night I had with everyone at Lori Post's house.  Thank you so much for your dear hosting!  As always you were wonderful.

What you need:
*Pretzel Bags with Ties
*Pretzel Rods
*Dipping Chocolate - White, Milk Choc, etc
*Decorative Toppings - Andes Mint Chips, Peppermint Chips, M&M minis, Hand-Dyed Coconut Flakes, 
*Icing Bag to Drizzle Chocolate, optional 
*Wax Paper

To Do:
1.  Assemble all of your decorations on flat surfaces ussing cookie trays, serving trays, pizza trays, etc.  Put down sheets of wax paper on the trays, then place your toppings on the wax paper. 


2.  If you are going to hand-dye coconut do that first because you will need to have time to toast and cool down.


3.  Lay down sheets of wax paper on your counter or table so that you can put your dipped pretzels on them to dry. 


4.  Melt your chocolate, either in microwave or double-boiler depending on what type of chocolate you have purchased.  Make sure you get a good chocolate that is not too waxy and tempers properly.  It is a little more money but in the end you will be thankful for how your pretzels turn out.  I use the A'Peels by Guittard Chocolate Co which require no tempering and can be heated in the microwave.  I purchase them from the Austin bake shop, Make It Sweet.


5.  Then dip!  Dip pretzel into chocolate, tap pretzel and drizzle off excess chocolate back into dipping bowl.  You will need to let the chocolate cool on the pretzel slightly before rolling in the toppings.  Otherwise, all of the toppings will fall off the hot chocolate.  You may also choose not to roll in topping and instead drizzle a contrasting color of chocolate on top.  


6.  Let cool well, then bag individually.


Tips:
*You will need about 20 to 25 pretzel bags for one bag of pretzel rods.
* Use a tall and narrow bowl or large mug that you can easily dip the pretzel into rather than have to lay down and scoop chocolate in.
*Bag pretzels individually to keep toppings on and to keep presentation in tact.  Also a better way for those receiving to pick up.


Snowman Buttons


This one is very easy.  Great for classroom parties, coworkers, guest room fluff, and well just for your good ole friends.  It's cute, what else can I say.  This year I made them to hand out at a cookie exchange and to give to a few friends too.  O' I love to create.

Supplies Needed:

* 4x6 Clear Treat Bags 
*Stapler
*Hot Glue Gun
*Scrapbook Paper, Xmas Color or Xmas Pattern
*Giant Black Gumballs 
*Avery Printable Labels
*Opaque Paint Marker

Tips

-Get the 4x6 clear treat bags at a craft store like Michael's and Jo-Ann's.  
-Find the giant gumballs by the color online or at a party store like Party City.
-Put just 3 gumballs in each treat bag to look like the 3 buttons on the snowman's jacket.  


DIY - Holiday Gift Tags

A super easy way to put a unique spin on your holiday gifts this year.  Just make your own gift tags.  You can chose any method you like.  Use ribbons, scrapbook paper, glitter or whatever you find around the house.  Heck why not try birdseed.

See below!  Super Easy.


What you need:

  • Blank Gift Tags (various sizes & colors available at your local craft store)
  • Glitter, Ribbon, or Scrapbooking paper
  • Glue/Glue Pen
Voila !!


DIY - Sugar Scrub Hand Exfoliater


What You Need:

- White Sugar
- Body Oil
- Jar with a Screw Top
- Something to stir with; Knife, Popsicle Stick, etc

1. Scoop the white sugar into the jar filling approximately half way. Loosely; No need to pack.

2. Add the body oil on top so that the jar is about 3/4 full.  

3. Stir; Carefully so not to spill

4. Each jar will be different because of the size you choose so you can add a little more body oil if necessary. You want a bit of excess oil compared to sugar so that the sugar mixture will have a coarse liquid consistency.

5. Enjoy!! Each time you use you will want to stir as the sugar will settle to the bottom. Put a small portion in your hands and then rub, sloughing off dry rough skin. After, rinse your hands in lukewarm water. Pat dry. Immediately use hand lotion; Determining the thickness and healing style of your choice.

Tips and Tricks

1. Don't use salt in place of sugar. Salt scrubs will burn any open skin, cuts, and wounds you have.

2. If you want to recycle then use some light massage oil or cuticle oil that is already under your bathroom sink going unused.

3. Either purchase a jar with a screw top or reuse an old, clean jar with a screw top. The screw top will help prevent any leaks.

4.  The bigger the jar the less you will have to refill; however keep in mind to test a little first and see if you like the oil and/or scent.  If not try a different type of oil/scent and if you only filled a small jar first there will be less waste.

Outdoor Fall Dinner Party

Outdoor Fall Dinner Party 

The goal of this Outdoor Fall Dinner Party was to achieve good old-fashioned camaraderie while being seated at the dinner table.  More often than not it is has become extremely difficult to find a Thanksgiving or Christmas dinner table that everyone can actually sit down together and enjoy their meal.  The hustle and bustle of everyone trying to find someplace to sit has worn me down.  Partially because I wanted to be in an adult setting (kids were welcome of course) and partially because I love to entertain I wanted to find a way for us all to enjoy a true dinner party for the holidays.  An event where no-one felt obligated to provide space for and everyone nearby could enjoy.  In some way we were all connected, either neighbors or co-workers who have become friends over the past year or two.  The location was the mini playground in between our apartment buildings.  Most of us could just walk out our front door.

November 3rd was the chosen date so that it did not interfere with anyone's Thanksgiving plans during the week of the bird.  Again a way to avoid the rush of people coming and going as most of us have multiple friends and family dwellings to visit.  The time was early afternoon of course as I despise evening holiday meals because you waste your whole day in anticipation and preparation rather than enjoying.  Thank you to Gramma Sharon for instilling the good value of lunch as the main holiday dinner meal.  Besides why remove the option of being able to eat leftovers for dinner?!

This dinner party was Co-Op style so that there was absolutely no need for a host or hostess.  Everyone was in charge of a minimum of two things on the list whether they were dishes of food, beverages, ice, coolers, tables, chairs, etc.  The Co-Op made this style of dinner unique and a fun way to refresh a potluck!  To be honest I did play the role of a coordinator so that all the items on the list were accounted for however to clarify for your own co-op party there was no actual hosting. In order to make sure everyone had a fair shot of being involved I did send out a letter with the co-op ideas and commitment requests.  That was only to ease the process of set-up and food.

The Food: 
Michelle and Brian your mashed potatoes were absolutely delicious!!  Leah and John thank goodness for your double batch of green bean casserole to provide for those wheat monsters and those GF.  And that was quite possibly the best homemade cranberry sauce ever.  Nadine, gosh darn those sweet potatoes were the most beautiful I have ever seen served at a holiday dinner. And thank goodness those were real and not the yucky traditional ones from a can with brown sugar and marshmallows poured on top.   Emma and Adam, you always have the best beverage selection and we can always count on your sommelier mind to guide us through any occasion.  Ben and Rose, ummm THANK YOU for bringing us a pie from Quacks on 43rd.  Bless you!  Brittany, we definitely could not have called this a holiday dinner without your rolls and pumpkin pies.  Additionally, I am glad that you brought your dad to carve the turkey!!  One spoiled thing that I did gain from my family was that we always had an electric knife to carve the turkey so when it came to manually carving this year I was out!  Too bad as John and I actually made the turkey!!  At least we didn't have to cut up our sage dressing and cheeseball!! And thank you to all the guys as they put up our emergency tents in the case of rain.  We only had about 10 minutes of droplets though, just enough to make the tablescapes appear as if there was a purposeful dew sprayed on them.

And of course since we live in Texas I suspected that someone would want to dump BBQ sauce on their food. Haha!  Brian you were the one...had I known earlier I would have sent that gigant-o bottle of Rudy's BBQ sauce home with you.


The table scatters were mini plastic acorns.

A fun and clean way to add crackers on the table.  Get a couple of
mini pails from your craft store and stuff with tissue paper.


Vintage Frames

It has been over a year and a half since I made these frames but I wanted to share with you some of my creations.  These frames are very simple but kind of dangerous if you are trying to avoid cuts from wire.  Be sure to have work gloves on hand.  I searched out the untold antique shops and hidden auction houses where prices have not paralleled today's vintage trend. Originally these frames were made to house my feather clips and brooches that I hand make and sell in the Austin area however I have since hung them in our bedroom to liven up our apartment.


The Fun Car of My Dreams

One evening John and I went to for a company meet up at a local dive bar. Upon our arrival we parked near a super fun car that I now want to create myself.  I have wanted a Volkswagen bug since I was 14 and have only dreamed of one.  Note I said bug not beetle!  I want one of the cute originals in a beautiful light powdery blue with a soft top and another of practically any color in a hard top.  


Now everyone knows that I am quite the do-it-yourself  creative type so seeing this car really has me going.  I want to find a junker that runs and deck the baby out to my strongest desire.  If I could fill an olympic size swimming pool with glitter, diamonds, rhinestones, and anything sparkly I would.  Be sure to add the diving boards.  Seriously when Mr. McDuck in Ducktales swam in his gold is honestly what I am envisioning with anything sparkly and glamorous.  Call me a girl.


This car actually reminds me of how my bedroom(s) where decorated during my jr. high and high school years.  The outlandish creative girl where schoolmates were surprised that I could do something cool.  Yes I majored in fashion and I loved to be a trendsetter but I think I was far too early for my years because it wasn't always an appreciation of the coolest with teenagers.  Eventually some things I did caught on.  Remind me and I promise I will post some old pictures one day.


Anyway here is this crazy awesome car.  Points for the artist who spent their time and energy creating such a wonderful piece.  I hope that I run into you and your car again someday!